Making Coffee Soft Serve Ice Cream
My favourite coffee item from Copenhagen, recreated in my kitchen.
The First Encounter
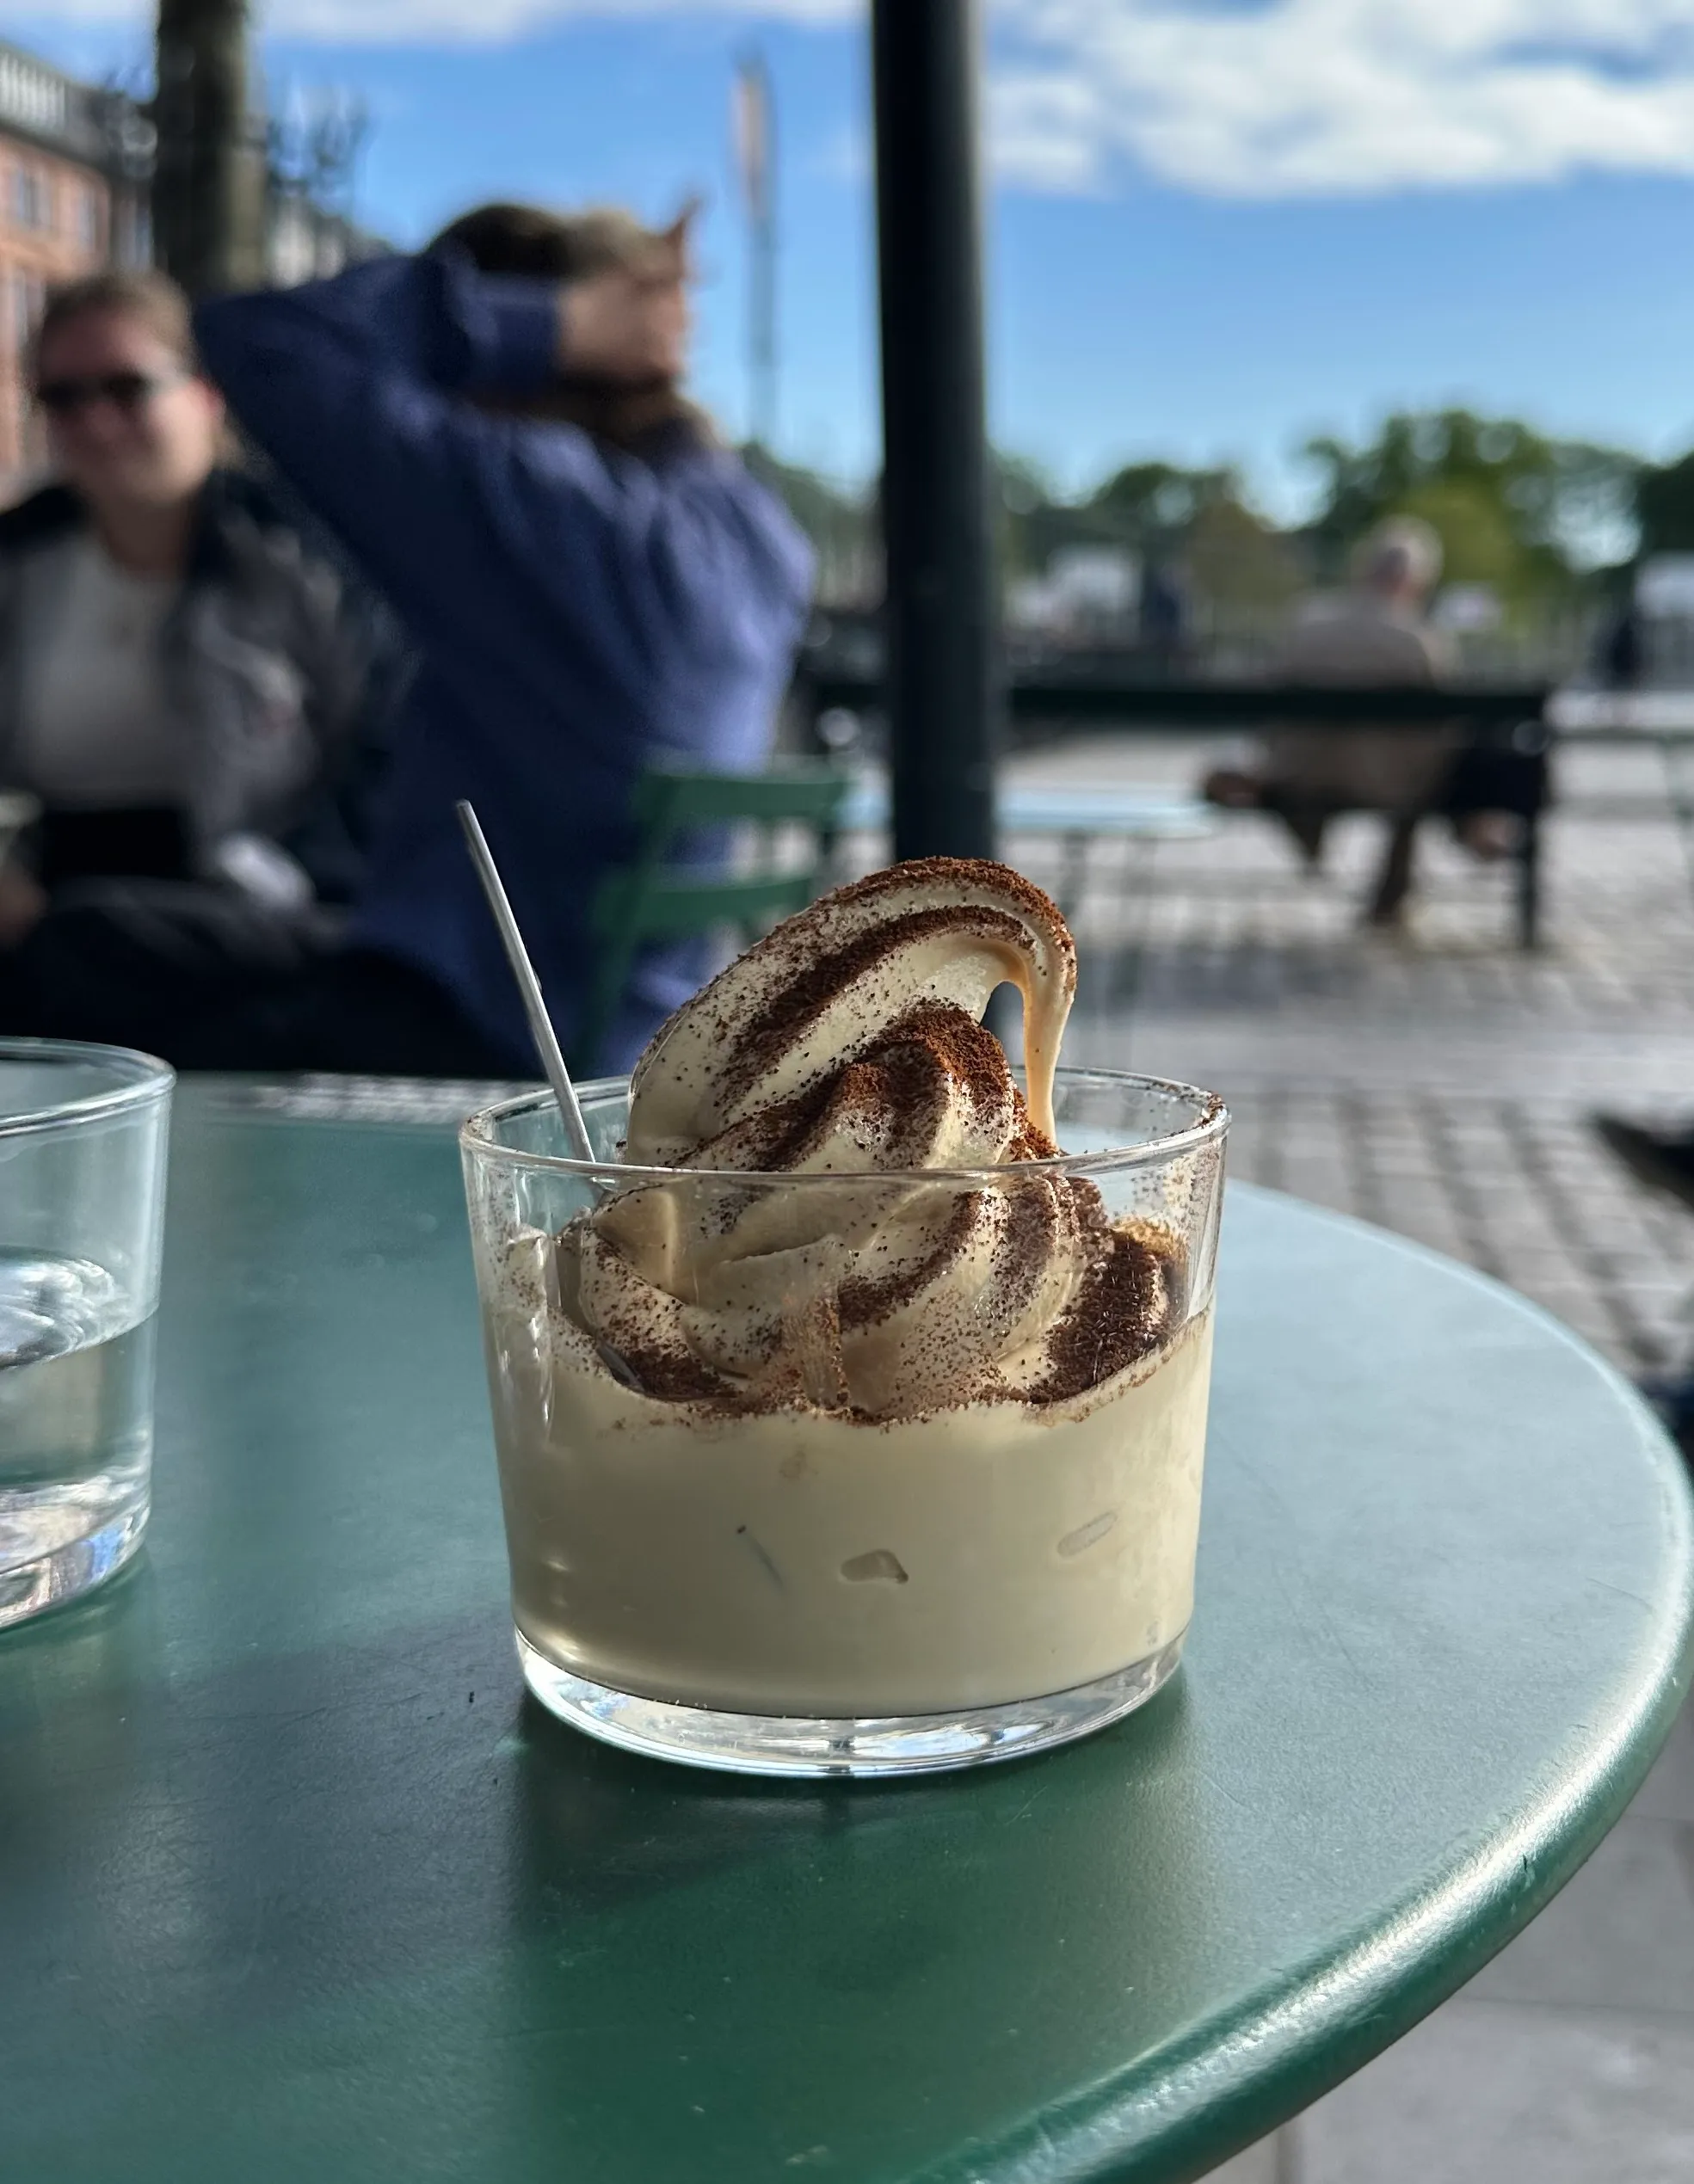
It is early May 2025, and I was in the coffee capital of Scandinavia, Copenhagen, for my grad trip. There are many world-renowned coffee shops there like April, Prolog, and La Cabra, but one chain in particular, Coffee Collective, serves a coffee soft serve during the summer months.
Coffee and ice cream? A match made in heaven.
I had to try it. And heaven it is. In fact I had it three times in three days.
I had to “Bring it back”
The first time I had this ice cream I knew I need to bring it back. You can’t exactly bring back ice cream, so I documented as much as I could hoping I would be able to recreate the taste and texture back in Toronto.
The Naive Recipe
Commercial powder soft serve mixes are available for purchase, so Angus, couldn’t you buy that, add milk to it, then add espresso and call it a day?
While that already sounds delicious, something about buying an instant produce just didn’t feel right. Plus since the mix is not designed to complement coffee, there is no guarantee that coffee would taste right in the mix, and it would be harder to adjust the recipe without knowing the roles of each ingredient.
So let the fun begin, I’m diving straight into the deep end, making coffee soft serve ice cream entirely from scratch.
The Trial and Error Process
First, getting the Taste right
I have never made ice cream before, so this task is quite daunting at first. One realization I had was that I remember finishing drinking the ice cream even after it melted. This was the first insight that gave me a starting point:
“A tasty liquid makes a tasty ice cream”
Although I might not know how to make ice cream, I know what tastes nice, so I started with what I was familiar with, making coffee.

Coffee Concentration
Coffee is a beverage with a balance of acidity, bitterness, and sometimes chocolatey flavours. Depending on the method of coffee extraction, different flavours may be more prominent in the brewed liquid. To complement and cut through the dairy of the ice cream, I opted to use a medium roast coffee from Brazil which has dark cherry, hazelnut, and chocolate notes.
To extract coffee, the ground coffee beans must be submerged in a solvent. There are many ways of doing so, of which I tried 4 methods:
- Espresso Powder - The easiest way to add coffee flavour to an ice cream is to add espresso powder, the most concentrated form of coffee. Doing so has the benefit of not introducing any extra liquids, preserving the ratio of all other ingredients. However I personally do not enjoy drinking instant espresso, as it looses all the nuances of coffee flavour, especially when sourced from North America which flavours a dark roast, which tastes like “burnt water” (to put it very bluntly). Therefore I will be using freshly ground coffee.
- Extraction in Dairy - The ice cream base is a concoction of dairy, which is mostly water by mass, so theoretically it can extract coffee flavours. One advantage of this method is that because no extra water is introduced into the dairy, the ratio between the liquids and fats are preserved. However in practice, coffee grounds absorb at least its mass in liquid, plus the acidity and milk solids in the dairy may change how coffee is extracted, compared to normal extraction using water. When using 1 coffee : 8 dairy base, what I found was that the coffee-infused dairy base was too acidic and had a metallic quality.
- Moka Pot Coffee Concentrate - According to Coffee Collective, they made their soft serve with fresh brewed espresso. Unfortunately I do not have an espresso machine that can yield the same concentration of coffee, so I used what I had available, which is a moka pot. This brewer also brews coffee with pressure like an espresso machine, which should increase coffee extraction. However because the coffee it brews comes out to be 1 coffee : 7 water, even though it made delicious coffee, it only imparts a watery and faint coffee flavour to the ice cream base.
- Cold Brew Concentrate - Another method to brew a coffee concentrate is to cold brew with a high ratio of coffee to water, which I used 1 coffee : 4 water. With this method, I submerge coarsely-ground coffee in water for 12+ hours, then strain the liquid through a filter or cheese cloth to obtain a smooth liquid. Because of its concentration, even a small amount of concentrate gives the ice cream base a noticeable coffee flavour. And as less water is introduced, the product also had a creamier texture, whereas more water would increase the amount of ice crystals in the final product.
At last, the cold brew method produced the tastiest result. For a 1:4 coffee to water mass ratio, after filtering it produces coffee concentrate 3x the mass of coffee. In my testing, I found that the ice cream achieves the best balance of coffee taste when coffee solids account for ~3% the total mass.
Theoretically one can produce even more concentrated coffee using this method, however due to the water absorption of the coffee grounds, the yield of the concentrate goes down significantly with higher concentrations. It would also take longer to brew/extract, more effort to filter, and possibly lower extraction.
* [Update Aug 26, 2025] I was able to test and refine my ice cream recipe with espresso shots from a local cafe that I regular. The espresso I got were ristretto shots of a medium roast Kenyan coffee, which should be sweeter, more concentrated, and less bitter than normal espresso shots. Although this coffee was different from the one I used to make the concentrate, I know this coffee well enough to distinguish taste differences due to extraction method and the coffee source. I tried to optimize the taste of the ice cream base to best suit this coffee (using the same “matrix” methodology). What I found is that the coffee’s roast profile and bitterness comes through much more prominently when extracted as an espresso or with pressure. There are two main reasons:
- Higher temperature results in higher extraction of the bitter notes, which is a factor when brewing espresso.
- Higher pressure results in higher extraction as well. Espresso is usually brewed at around 9 bars of pressure, which is how this method is able to produce such concentrated coffee. I also tried to make cold brew concentrate (1:3 ratio) with the Oxo Rapid Brewer (~1 bar of pressure), and noted the same astringency in the Brazilian medium-roast coffee, which I did not taste when extracted as a cold brew.
Ultimately, extraction by pressure introduced an unpleasant lingering bitter aftertaste to the ice cream in the back of the mouth, even though the ice cream is balanced to have no perceived bitterness initially. One may be able to reduce the bitter aftertaste by skimming the crema from the espresso, though I did not test this as I believe the bitter compounds are dissolved into both the body and crema of the espresso shot. All in all I found the cold brew concentrate method produces tastier ice cream than the traditional wisdom of using espresso.
Takeaway: For ice cream to taste like coffee, the concentration of coffee added must be high. Only when the concentration is high enough, will your ice cream taste like coffee instead of dairy. With this concentrate, one must still balance the ratio of coffee liquid and ice cream base, as too much coffee will turn your ice cream bitter.
For a little richer coffee taste, often a tiny amount of cocoa powder is added to enhance the perceived coffee flavour. I added 0.8g of cocoa powder per kg of ice cream. Make sure to mix cocoa powder with the dry ingredients first. Do not worry about small clumps as it will further disperse when the ice cream is churned in the machine.
Dairy Content
A creamy dessert must balance its fat ratio for the desired texture, while not leaving a greasy aftertaste. A hard ice cream usually has ~15-20% fat for a rich taste, whereas soft serve has 4-10% fat to achieve lightness according to this blog post. This fat ratio is determined by a recipe’s ratio of dairy products, usually a mixture of whipping cream (35% fat, also called heavy cream), and whole milk (3.5% fat, also called homogenized milk). Although the fat ratio is calculated as the weighted sum of fat by mass, since dairy accounts for over three quarters of the final mass in most recipes, one can well approximate the fat ratio as the weighed average of fat content among the dairy used.
In my case using cold brew coffee concentrate, I found that an ice cream of around 6.5% fat delivers the best mouth feel and aftertaste, without leaving any lingering greasiness.
Another important dairy metric is milk solids ratio. This ratio must be high enough to ensure the ice crystals in the ice cream are suppressed for a creamy product. In general according to the same reference as above, the higher this ratio the better. Unfortunately since I do not have access to a commercial-grade soft serve machine, I am not able to create ice cream with a perfectly smooth texture. Due to this limitation, I mostly ignored tinkering with this ratio. To increase the percentage of milk solids beyond what is contained in whipping cream and whole milk, skim milk powder is used. I did observe that the inclusion of skim milk powder increases the matte texture of the soft serve ice cream, as it absorbs the free water that is not emulsified in the ice cream liquid.
Takeaway: Test out different ratios of whipping cream and whole milk for the desired creaminess and richness, while minimizing a greasy aftertaste. Include as much skim milk powder as possible as long as the balanced taste is conserved, as this ingredient improves final texture.
Sugars
Ice cream is a sweet treat, that’s a given. Taste aside, sugars are necessary for to give elasticity and “pull” to your ice cream. I used white sugar since that is what I had at hand, though online some recipes recommend using corn syrup for texture. For some ice cream flavours using brown sugar may be desirable to increase richness, however I found that the taste of molasses was too rich and gave my ice cream too much elasticity. Keep in mind that skim milk powder also contains mostly sugars, so when experimenting with sugar ratios one must balance the two (or more sugars). With too little sugar, your ice cream may taste bland and flat, but too much would also mask the taste of coffee and dairy.
Takeaway: Be realistic about how much sugar you should add, a good starting point is add as much sugar until it tastes around the same sweetness as what you can get from a store. Once the ice cream is frozen, the perceived sweetness is reduced so add a little more sugar than you think is sufficient.
Then, perfecting the Texture
Texture is what separates a soft serve ice cream from a hard ice cream.
Emulsifier
With a significant fat content in the ice cream base, an emulsifier is required so the fats and water do not separate, as separation would increase the amount of free water molecules, in turn promoting the formation of larger ice crystals, resulting in a less smooth product. At first I tried using powdered soy lecithin, but I found that it imparts an unpleasant soy aftertaste and a grainy texture. Instead, I went with egg yolks, which are 10% lecithin in content (so I used 10x the mass in egg yolk than I used in powdered lecithin) and did not cause unpleasant tastes. In total I used 1.8g of egg yolk per kg of ice cream.
Takeaway: Experiment with different emulsifiers, as some may bring along unwanted tastes and textures. Egg yolk had the most neutral taste in my testing.
Stabilizer
Stabilizers increase the gel-like properties of your ice cream, which enhances texture and gives you the ice cream “folds” and peaks, and it also slows the melting of your frozen dessert. There are many types of stabilizers that has different “elastic properties”. For commercial use, they often use a blend of carrageenan, locust bean gum, and guar gum. For my recipe, I only used guar gum (which you can get from BulkBarn) and still it managed to produce a satisfying result. Xanthan gum would also work, though it is more gel like than guar gum.
As stabilizers binds to itself, you must disperse it first by mixing it thoroughly in your dry ingredients, otherwise gel clumps will form in your product. Even tiny amounts of stabilizer is sufficient, I used between 0.8g to 1.0g per kg of ice cream.
Takeaway: Stabilizers are potent even in small amounts, so measure precisely.
Ice Cream Machine
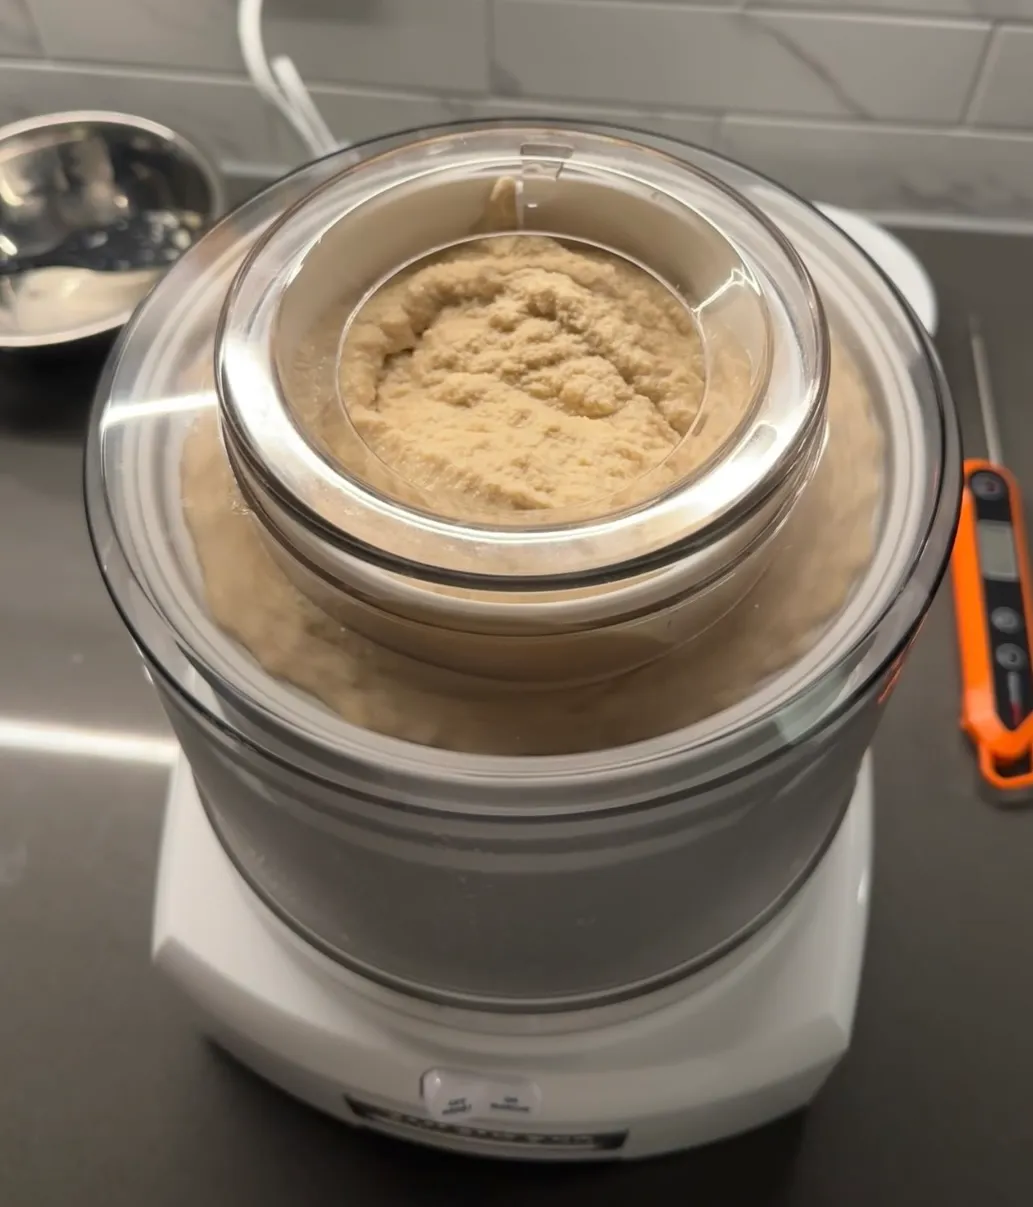
Many ice cream machines can work, as long as it acts as a cold-source, and sufficiently agitates ice cream to incorporate air. I have the Cuisinart Ice Cream Maker on hand which I used to produce a decent texture. Also on the market are the Ninja Cremi series of makers and Gourmia Soft Serve machine available at Costco Canada.
There are also recipes online which uses crushed dry ice and a stand mixer to freeze the ice cream base, but note that dry ice requires proper handling to prevent frost bites, and dry ice is usually sold in larger quantities.
One can expect the ice creams output from different machines to vary in texture, so additives that enhance texture may have to be adjusted.
Serving Temperature
The serving temperature is arguably the most important factor in the texture of the final product. Too cold results in a stiff ice cream (though still makes for a good hard ice cream), and not cold enough… well you’d get a milkshake. For soft serve between -7 to -5 Celsius is ideal. More inexpensive ice cream machines do not allow for precise temperature control, so you are unlikely to achieve the ideal texture. However, commercial machines (in the $1000s) and the Gourmia machine freeze your ice cream using a compressor, therefore producing a replicable and ideal consistency every time.
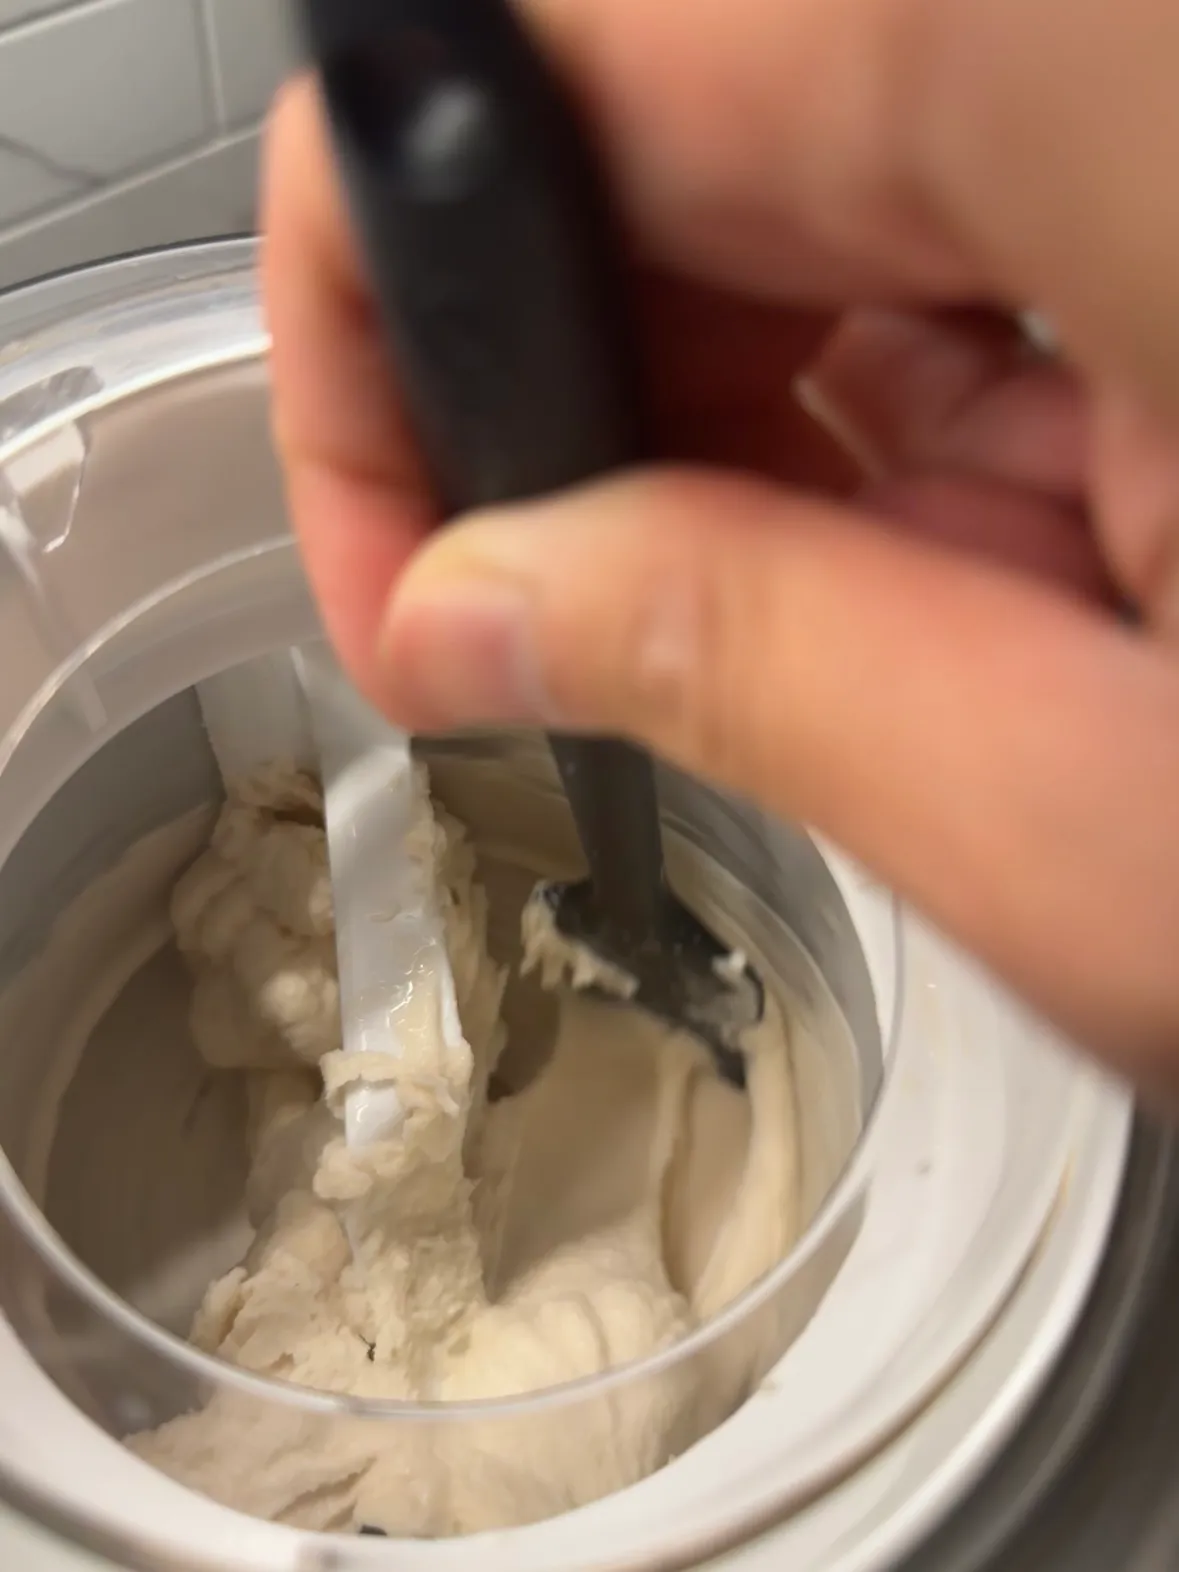
Notes for the Cuisinart Ice Cream Maker: My ice cream expanded around 40-50% after churning (due to ice expanding and air incorporation), so be careful not to over fill. 1 kg of ice cream base expanded to max capacity in my 1.5L machine. It takes around 20 minutes of churching until a soft serve-like consistency, smaller batches will freeze quicker. I found that manually pushing the ice cream around the freezing bowl can effectively thicken ice cream by encouraging more ice cream to contact the bowl, which further cools the ice cream by several more degrees. All in all, this machine is able to achieve -4C consistently, measured using a stick thermometer. You may be able to further improve texture by freezing the ice cream in the freezer for 30 more minutes. In addition, avoid adding the bits of ice cream stuck to the side of the ice cream bowl, as they are too cold, and therefore no longer smooths. Those ice cream shards once scraped out becomes a delicious chef’s snack though!
Ice Cream Presentation
Now with this delicious creamy coffee soft serve that I proudly made, the final step is to put it on a pedestal.
Serving Ice Cream
Since this ice cream is only -5 celsius, it is prone to melting. You can mitigate this by chilling the serving bowl while the ice cream is churning.
Soft Serve Swirling
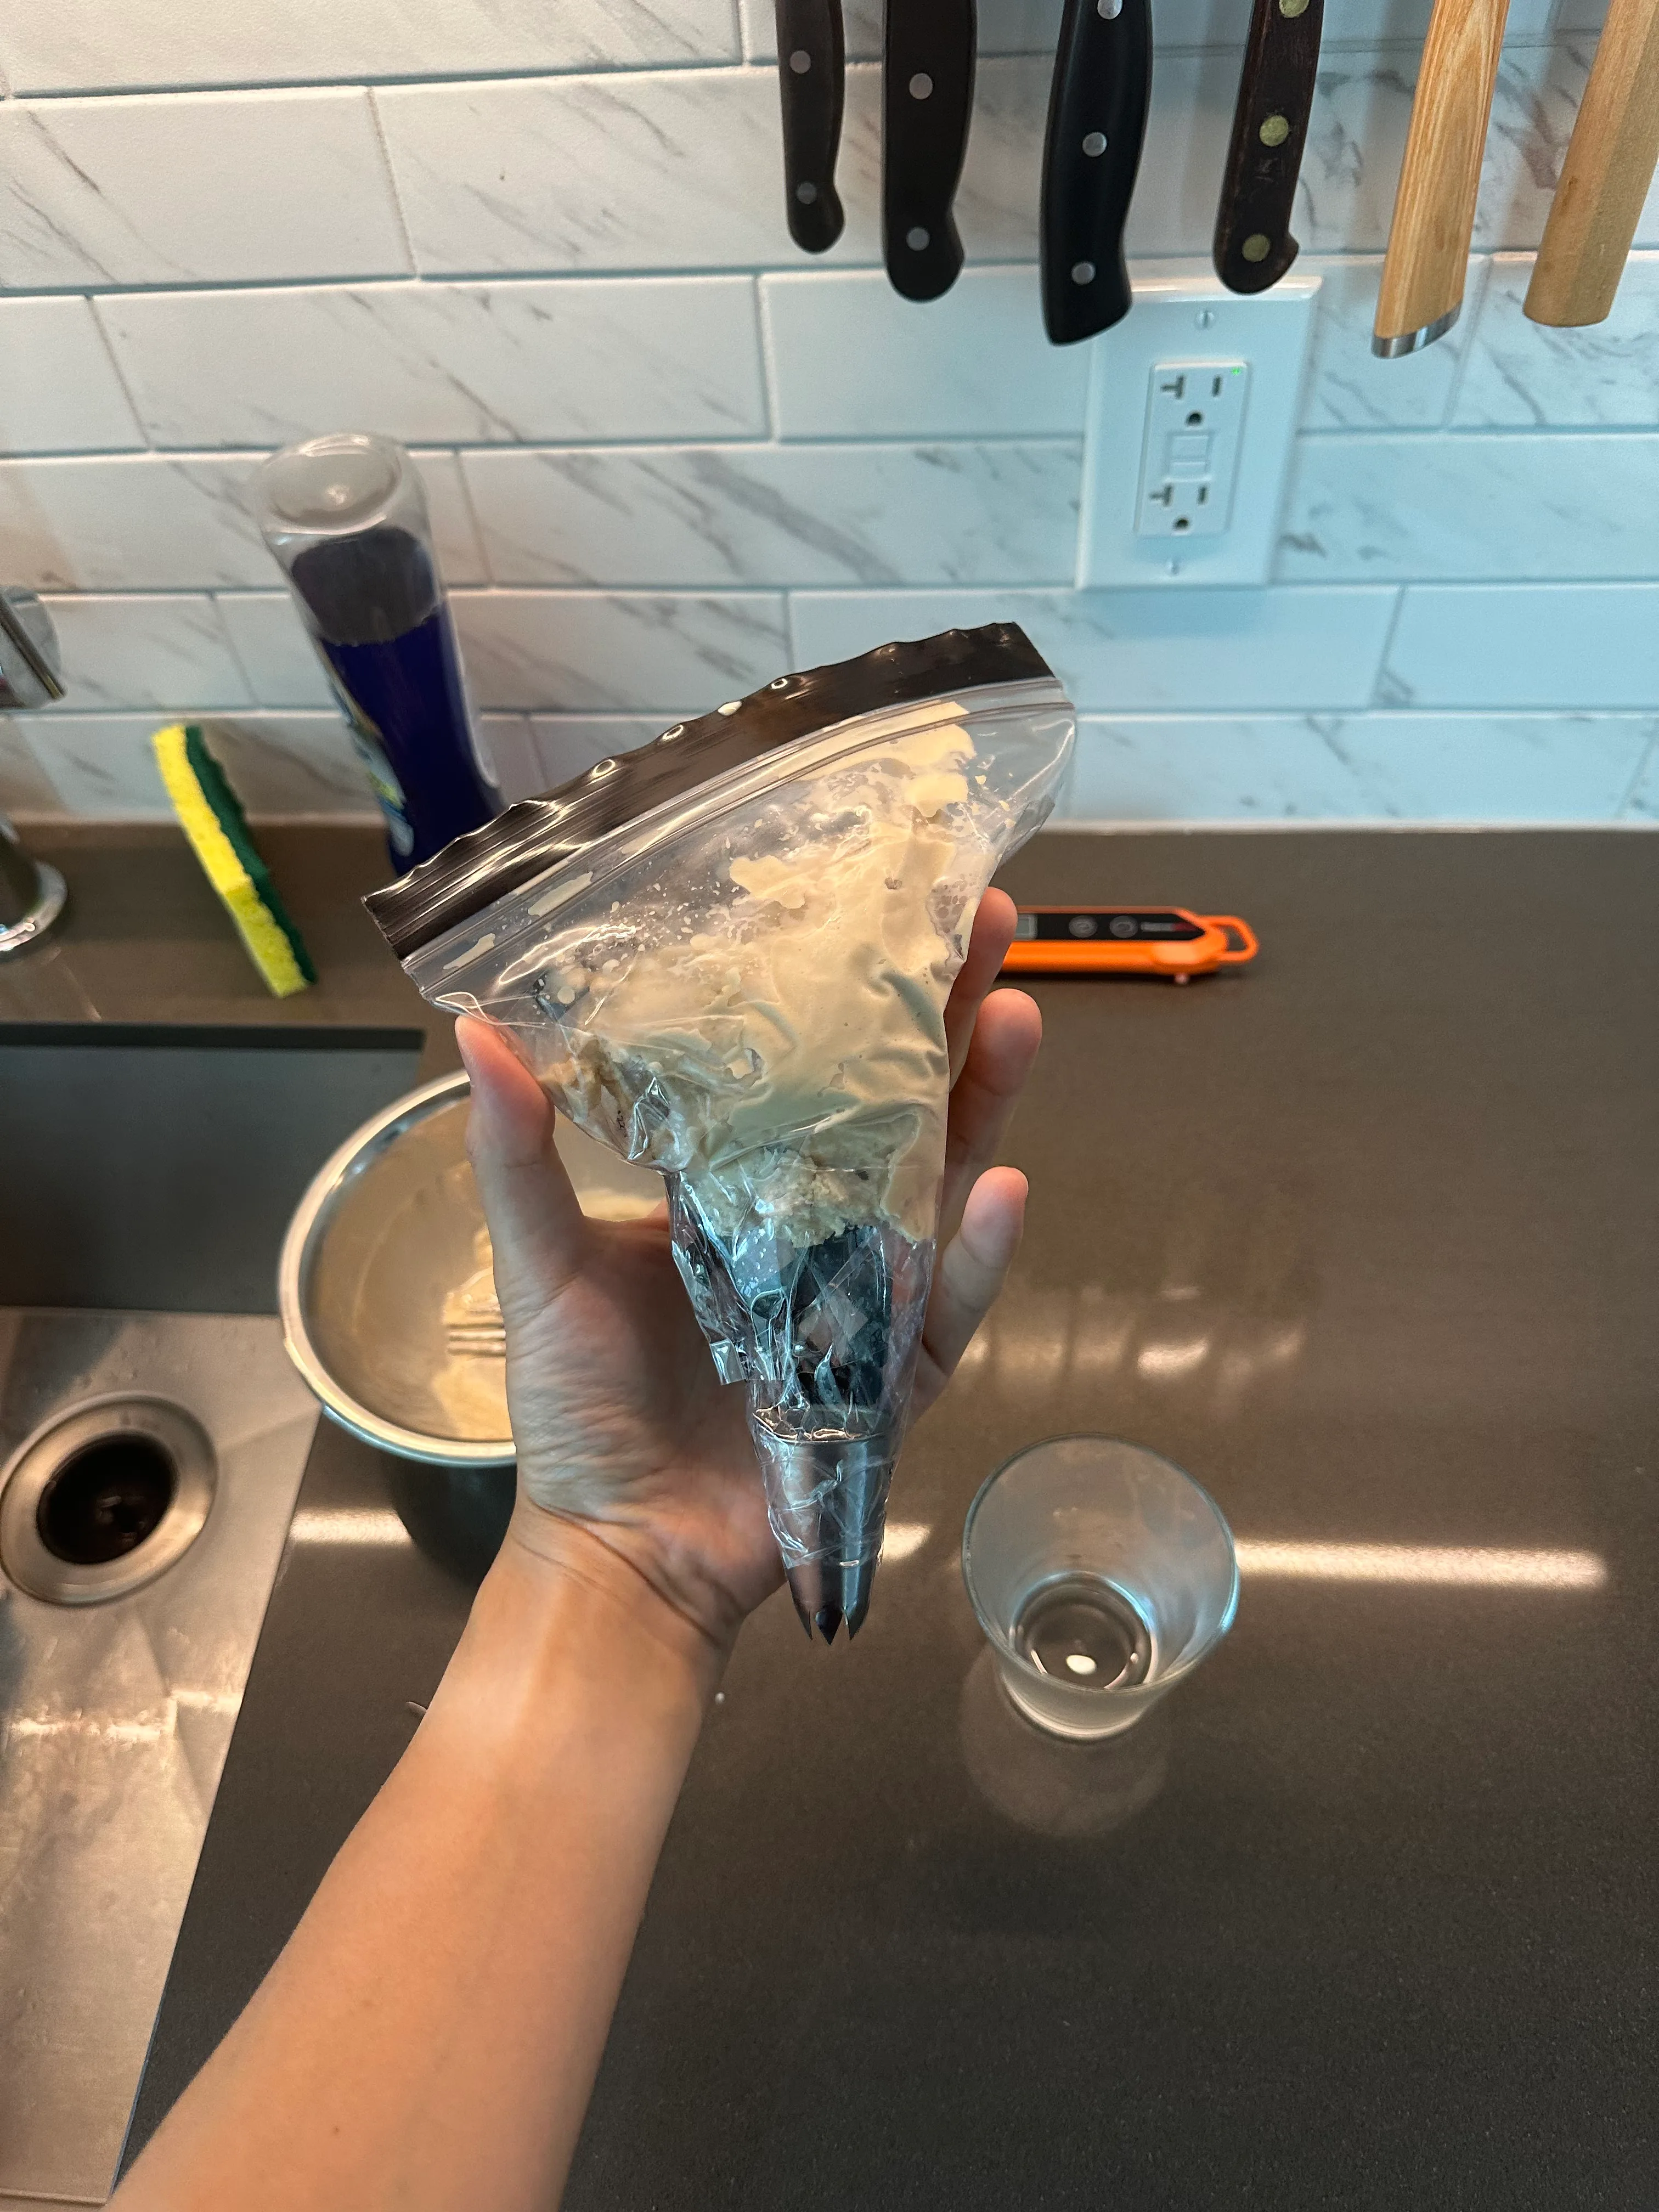
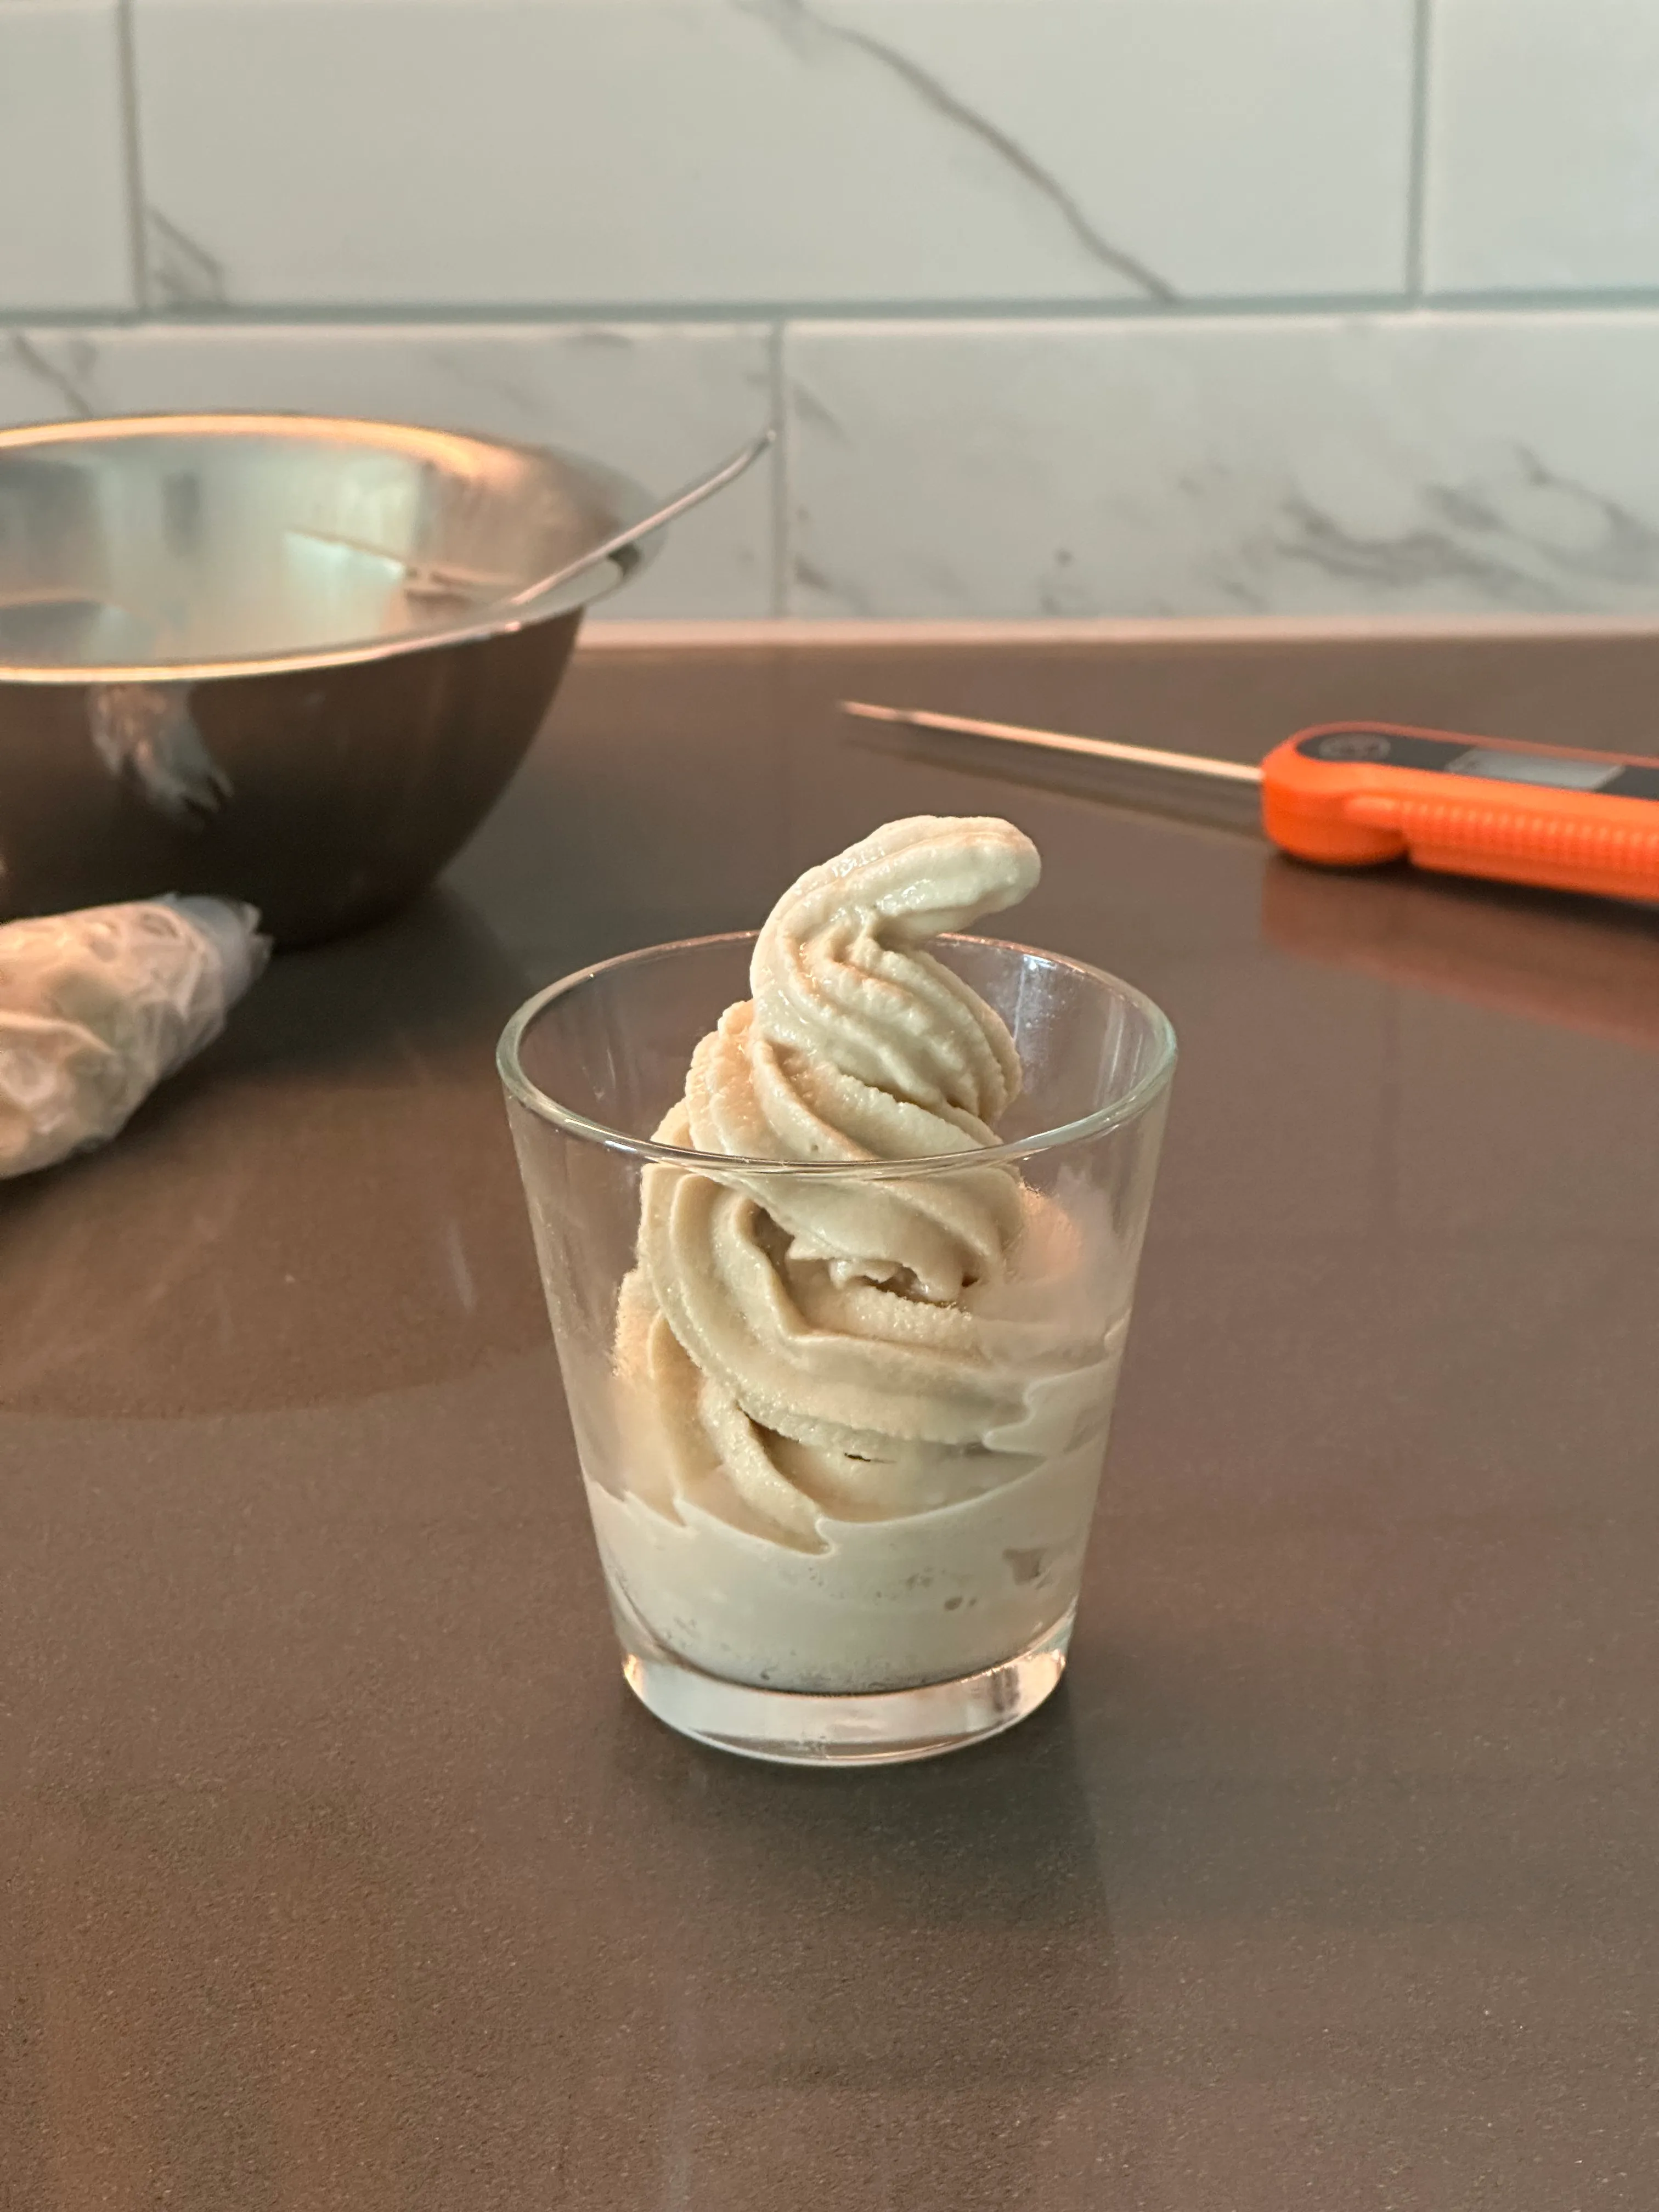
The iconic soft serve swirls make your ice cream taste better, your eyes eat first after all, so don’t starve your eyes of the treat. Soft serve ice cream at -5C is naturally pipeable, so any medium to large closed star piping tip will work. If you can only find an open star tip, you can bend the sharp ends inward by pushing each tip against your kitchen counter top. I also did not have piping bags, thought I found zip lock bags to work surprisingly well once taped to form the tip’s angle (as shown below. ugly, but it works haha). If your ice cream is too firm or too cold, simply massage the ice cream inside the bag; if it is squeezable, it is pipable.
Cute! And move quick, once you start piping, the ice cream melts rapidly upon contact with your hands.
So I did it! I recreated a coffee soft serve ice cream from scratch, and comparing to Haagen Dazs coffee ice cream which I previously loved (it will still do in a pinch), this blows that completely out of the water in terms of coffee taste. The texture is still not comparable to one made with a commercial machine, but I think I am 90% of the way there even with that I had on hand.
What’s Next?
It would be cool to get my hands on a commercial soft serve machine to truly experience my recipe. I would also love to adapt this recipe to use espresso shots instead of a cold brew concentrate, as I image the product would turn out more fragrant and have more complex natural coffee sweetness.
Regardless, this coffee soft serve is my summer treat of 2025, and I am proud to have created my first recipe of many to come…